
English | Italiano
Overview · Pro edition · Compare editions · User guide
EgoMailExtractor reads emails, recognises relevant messages and extracts data into a structured Excel workbook. The first part covers everyday use with a PayPal profile; the second explains how to create an ING banking profile with the Pro Wizard.
Mailbox → Extraction profile → Email type → Rules → Fields → Excel
The screenshots use the Italian interface and Italian sample emails. Original interface labels and shorthand tokens are retained where useful so you can match the instructions to the screenshots. Configure filters and rules for the emails you actually receive.
1. Configure the mailbox
An IMAP profile contains the connection parameters for your mailbox. For Gmail, for example, the usual server is imap.gmail.com, the SSL/TLS port is 993 and the inbox folder is INBOX. Follow your email provider’s current authentication requirements.
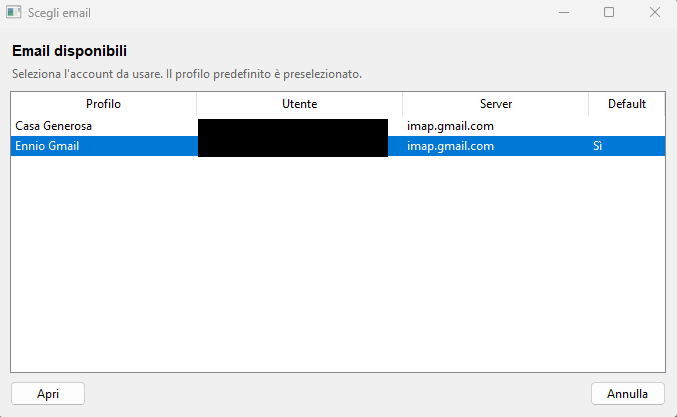
2. Choose the extraction profile
The extraction profile defines which messages to recognise and which fields to extract. A PayPal profile can extract the amount, recipient, transaction date, order code, bank and other useful details.
3. Start extraction
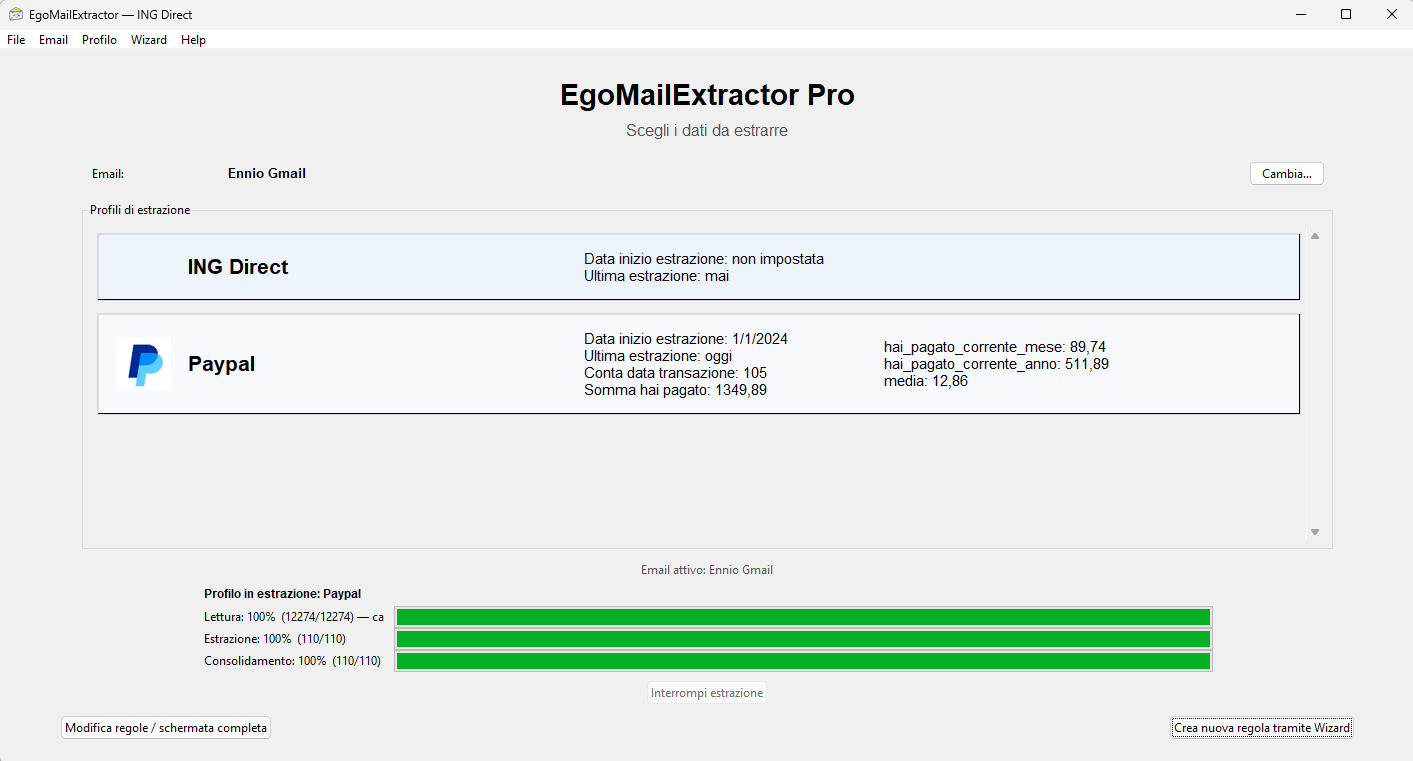
On the main screen, choose Estrai nuovi dati e aggiorna il file Excel generale (extract new data and update the consolidated Excel workbook). Processing proceeds in stages and can resume from data already acquired.
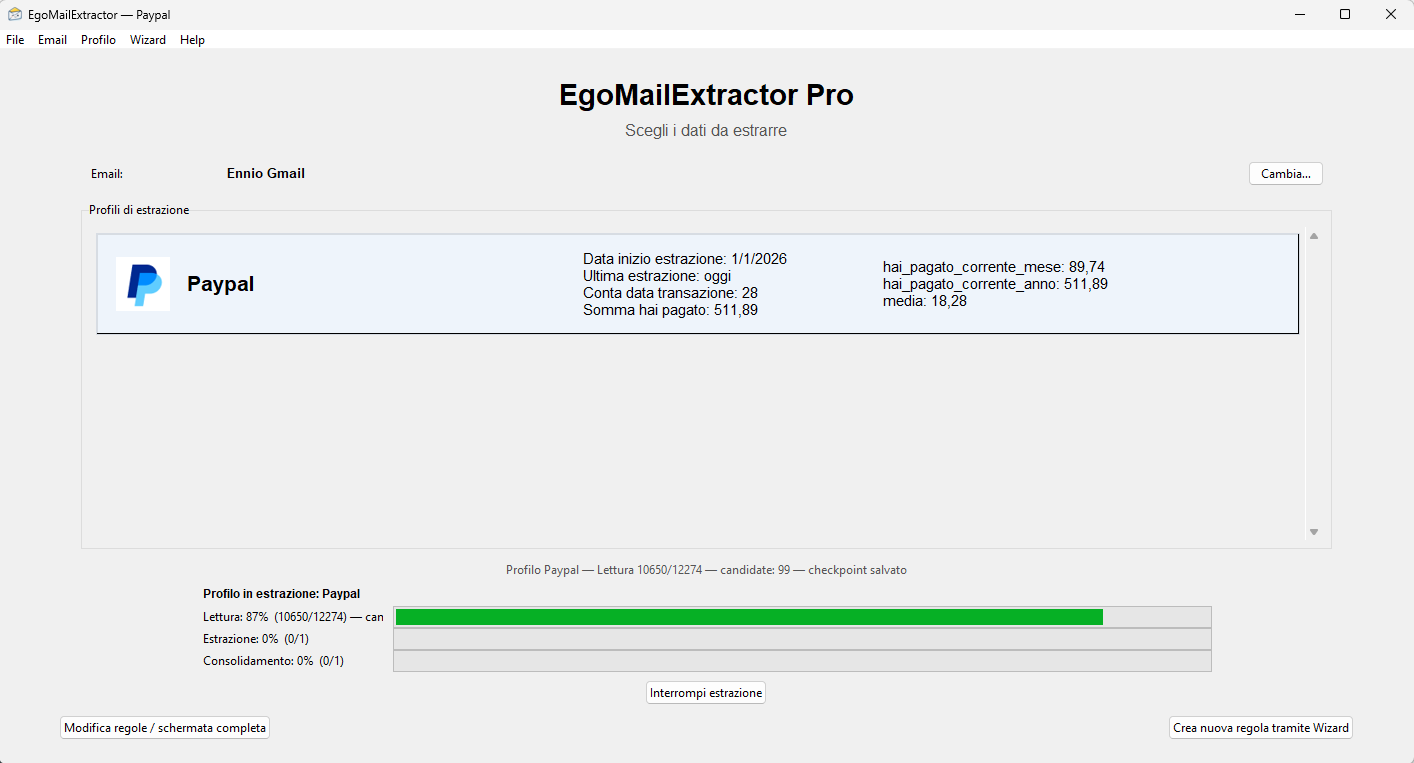
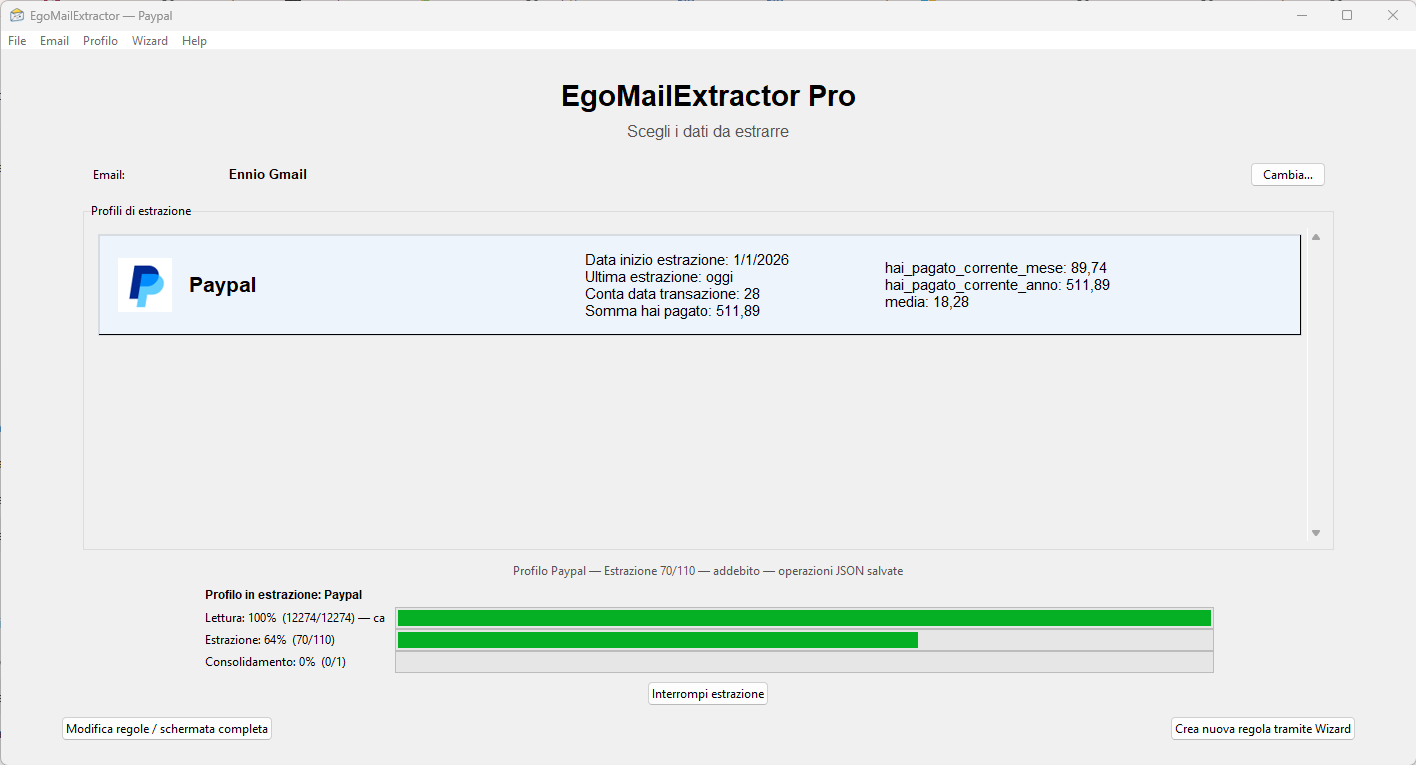
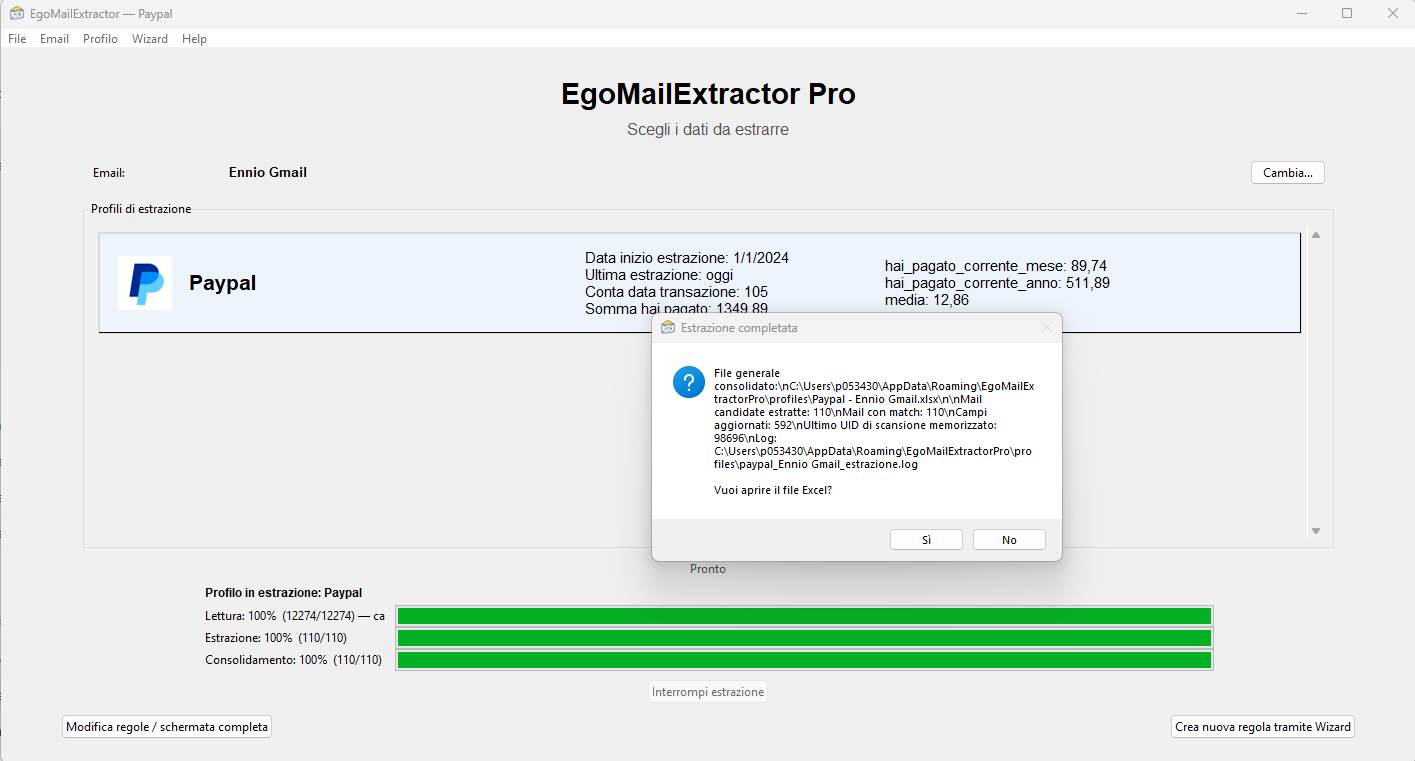
4. Review the Excel output
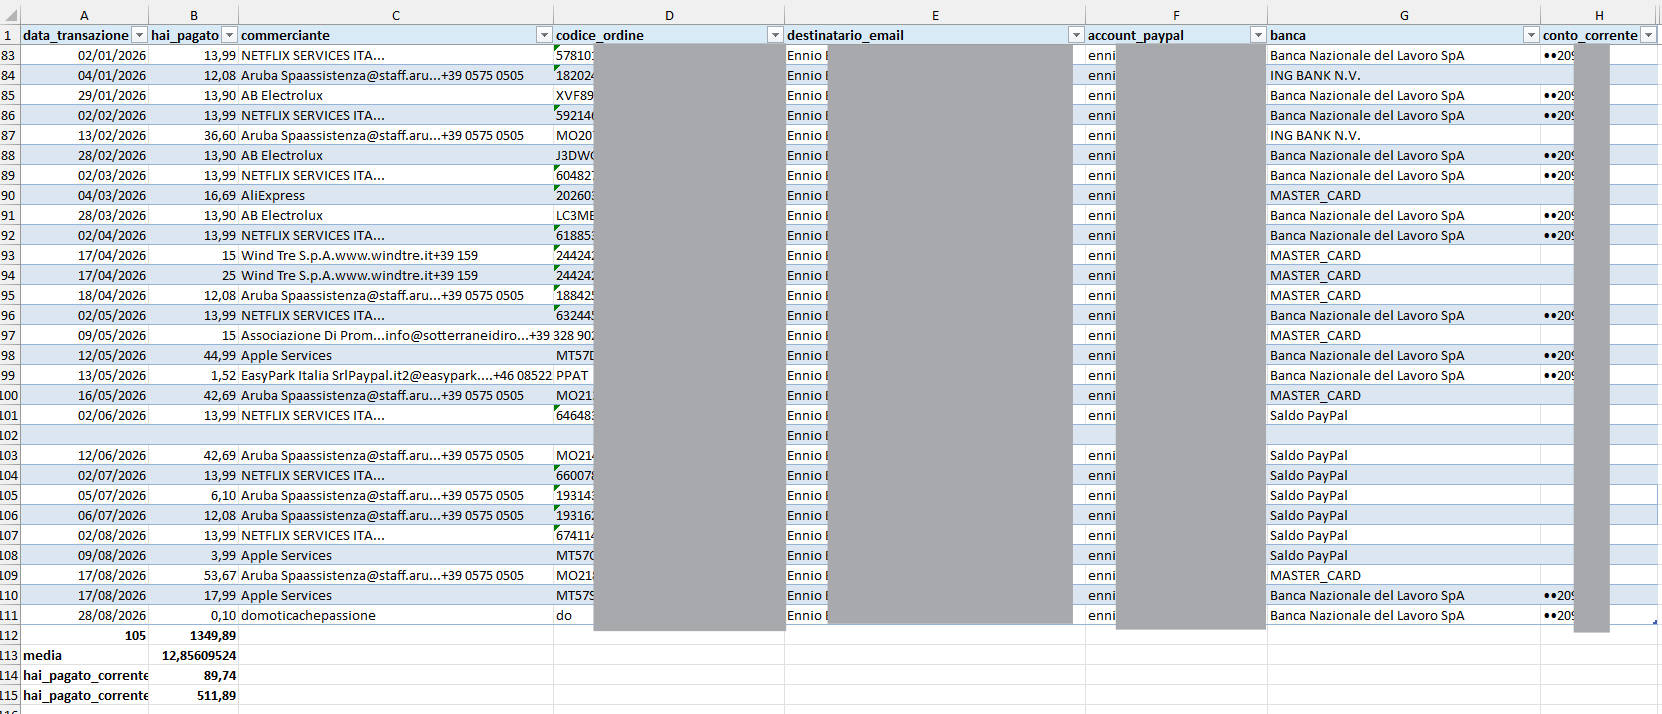
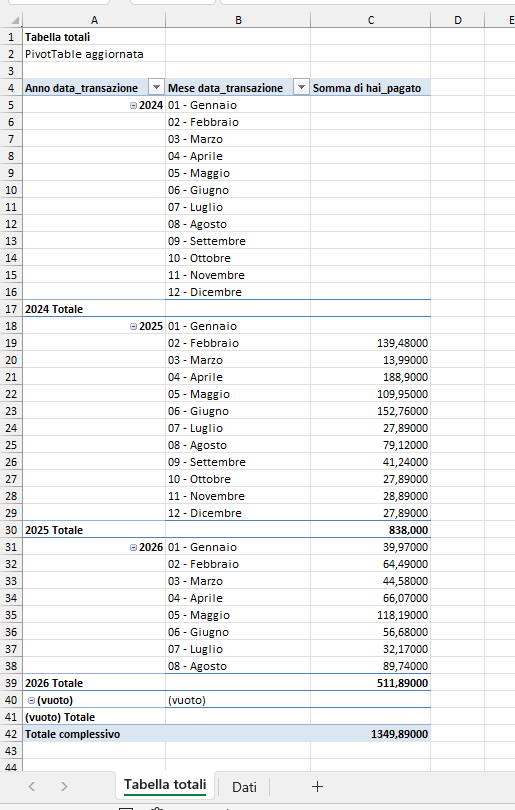
Each profile field becomes a column. The example below shows extracted PayPal data organised in an Excel worksheet.
Complete example: create an ING profile with the Pro Wizard
The Pro Wizard builds profiles from real emails. This example follows the process from defining an email type to testing rules, setting up summaries and activating the profile.
Key idea: PRECEDE – DATO – SEGUE means preceding text – data – following text. PRECEDE locates the value, DATO describes its pattern and SEGUE can delimit its end when needed.
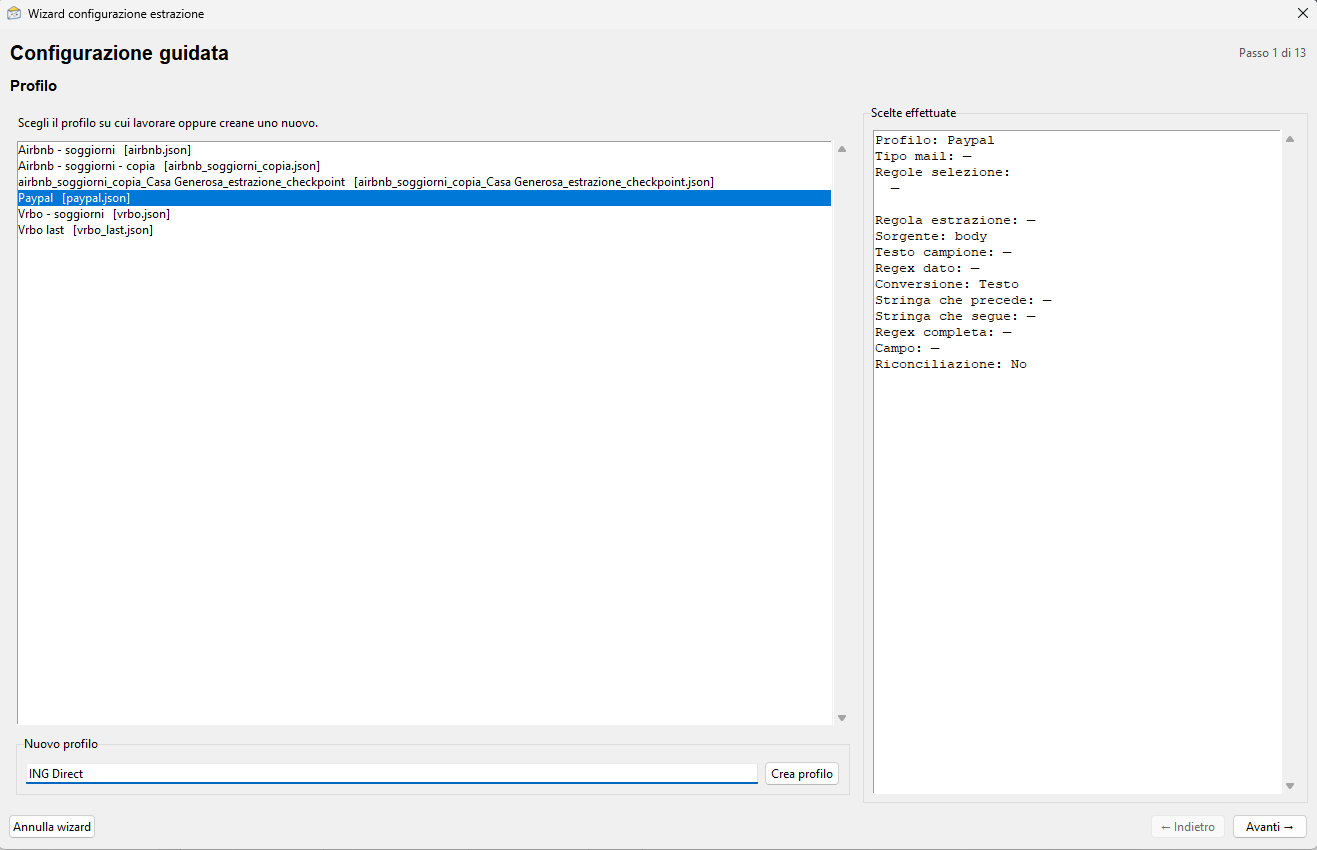
Step 1 — Start the Wizard and choose a profile
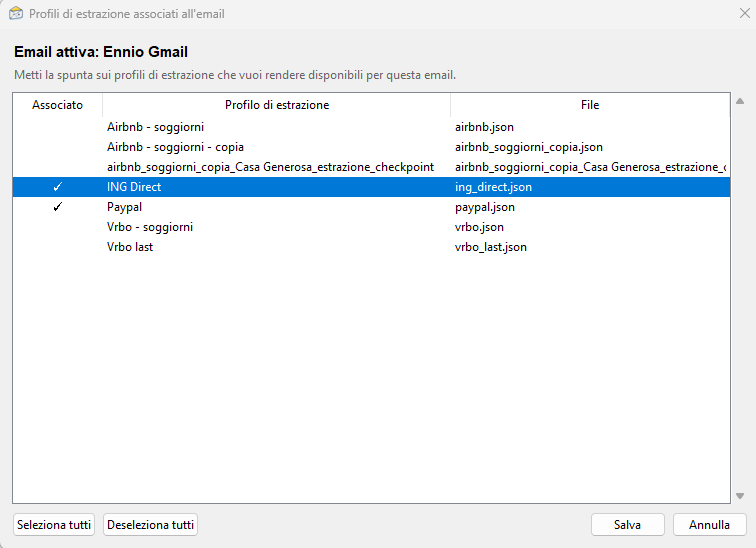
Launch the guided setup and select the extraction profile to work on, or create a new one. This example uses an extraction profile for ING banking notifications.
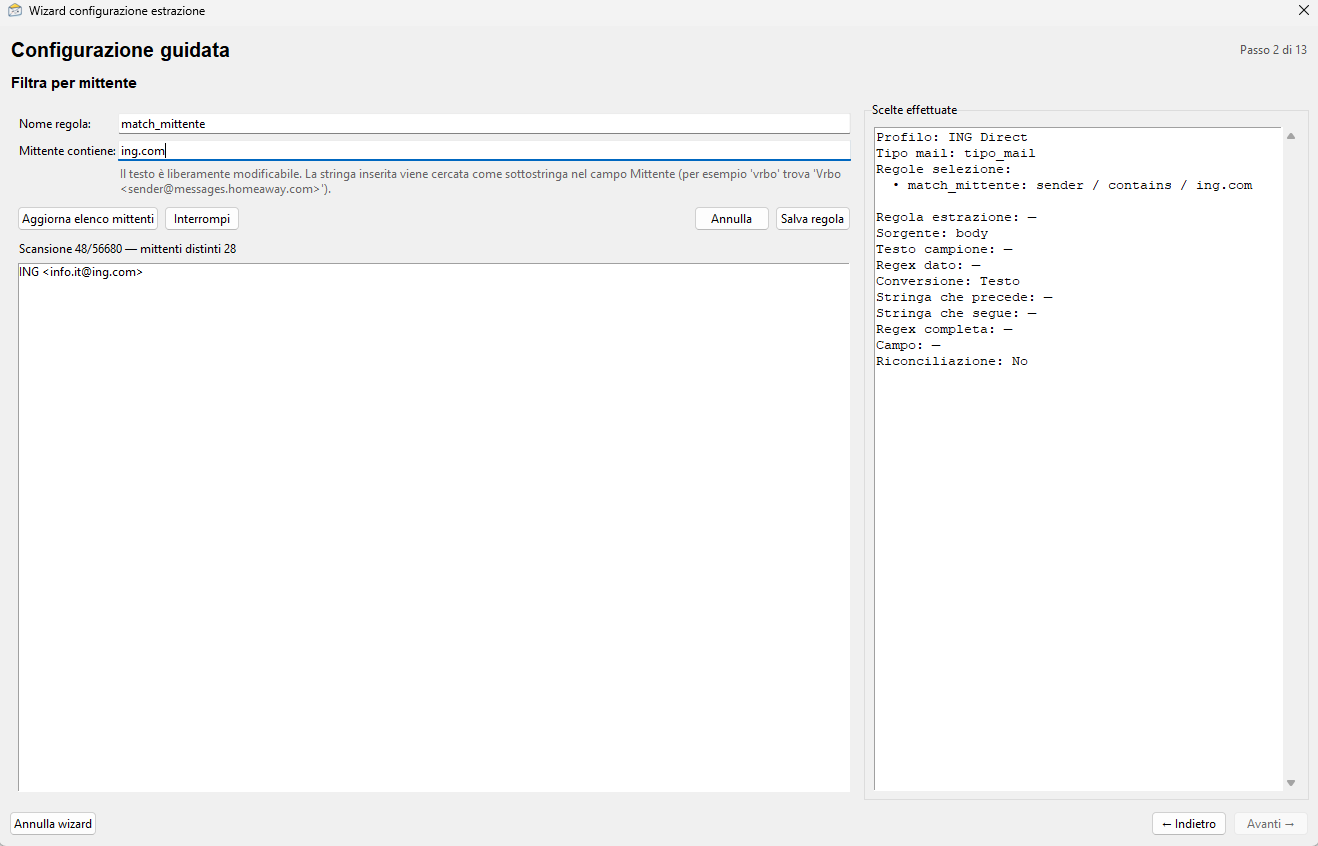
Step 2 — Filter by sender
The sender is a useful criterion for identifying a family of messages. Make the filter specific enough to select the bank emails, without imposing unnecessary restrictions.
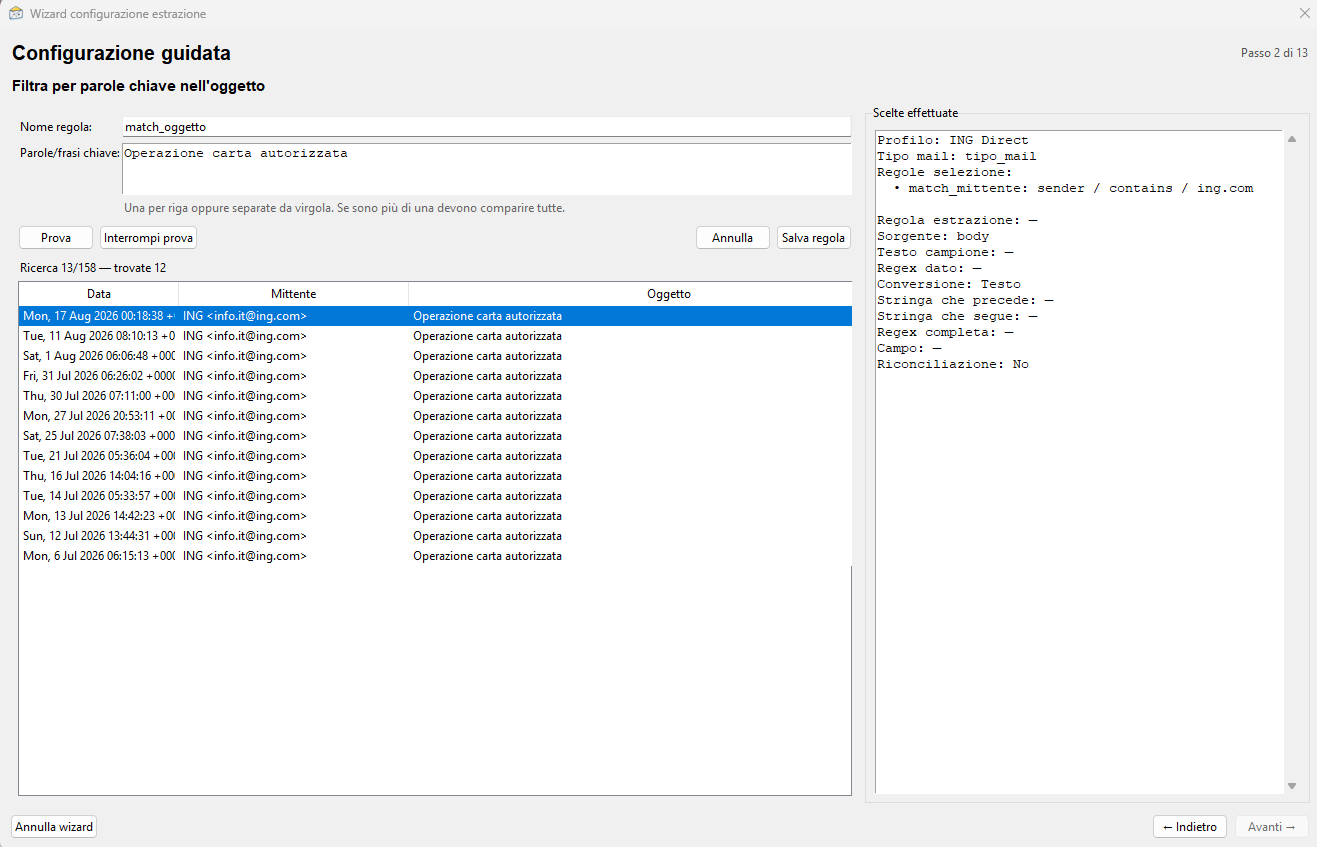
Step 3 — Filter by subject
The subject filter narrows down the email type. Sender and subject criteria work together so the rules apply only to relevant messages.
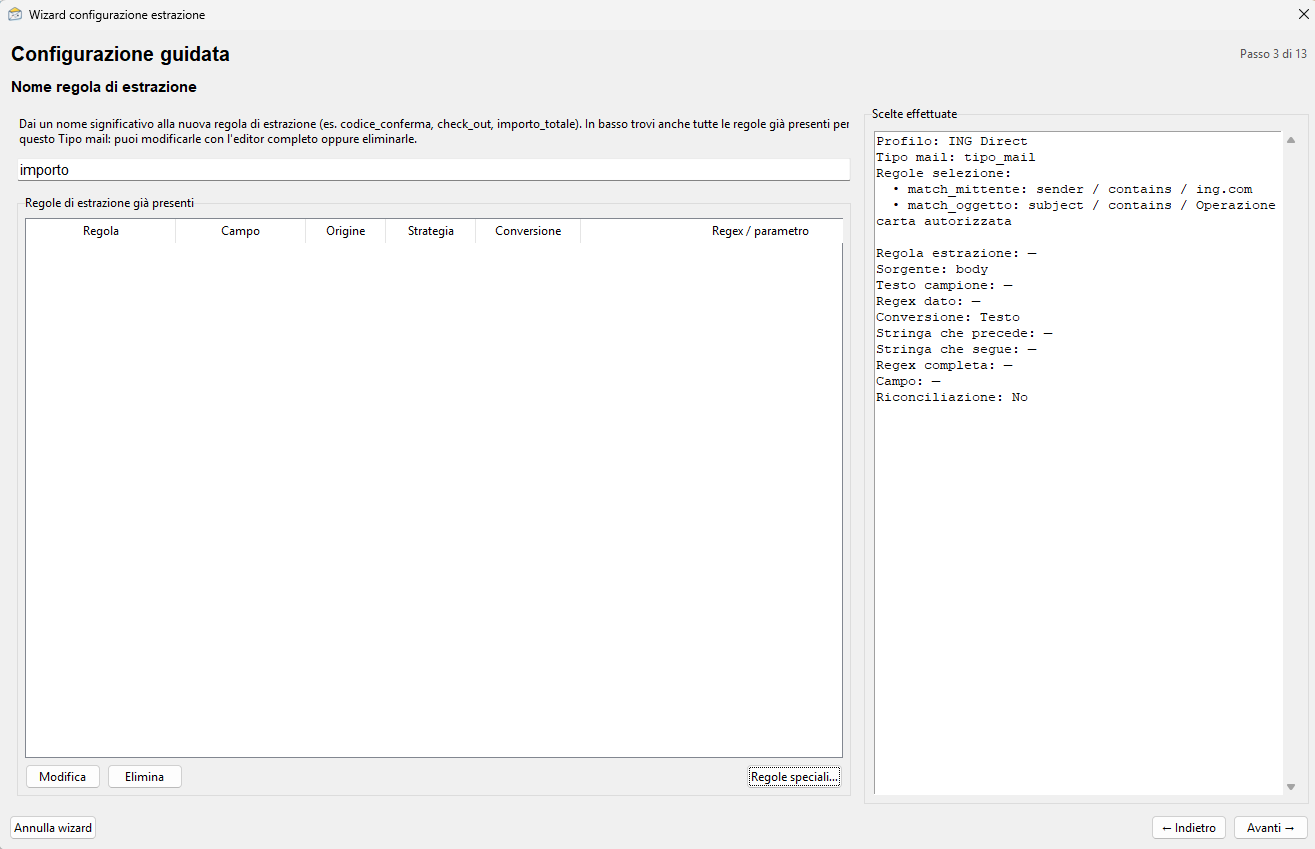
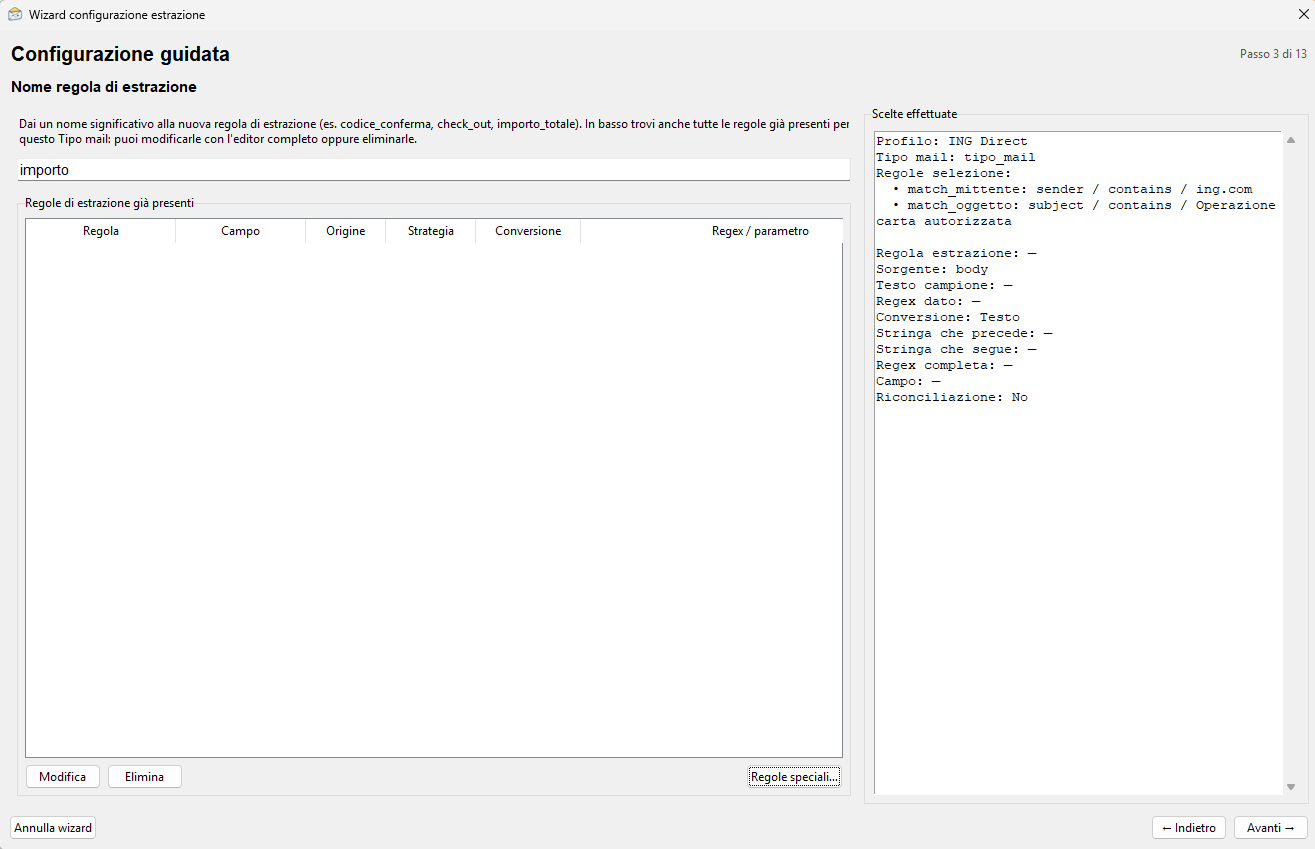
Step 4 — Name the rule
Give each rule a short, meaningful name that describes the value it extracts. Consistent names make profiles easier to maintain.
Step 5 — Select the value in a sample email
Choose a representative email and highlight exactly the value to extract. The selected value is an example: the rule must also work when the value changes in later emails.
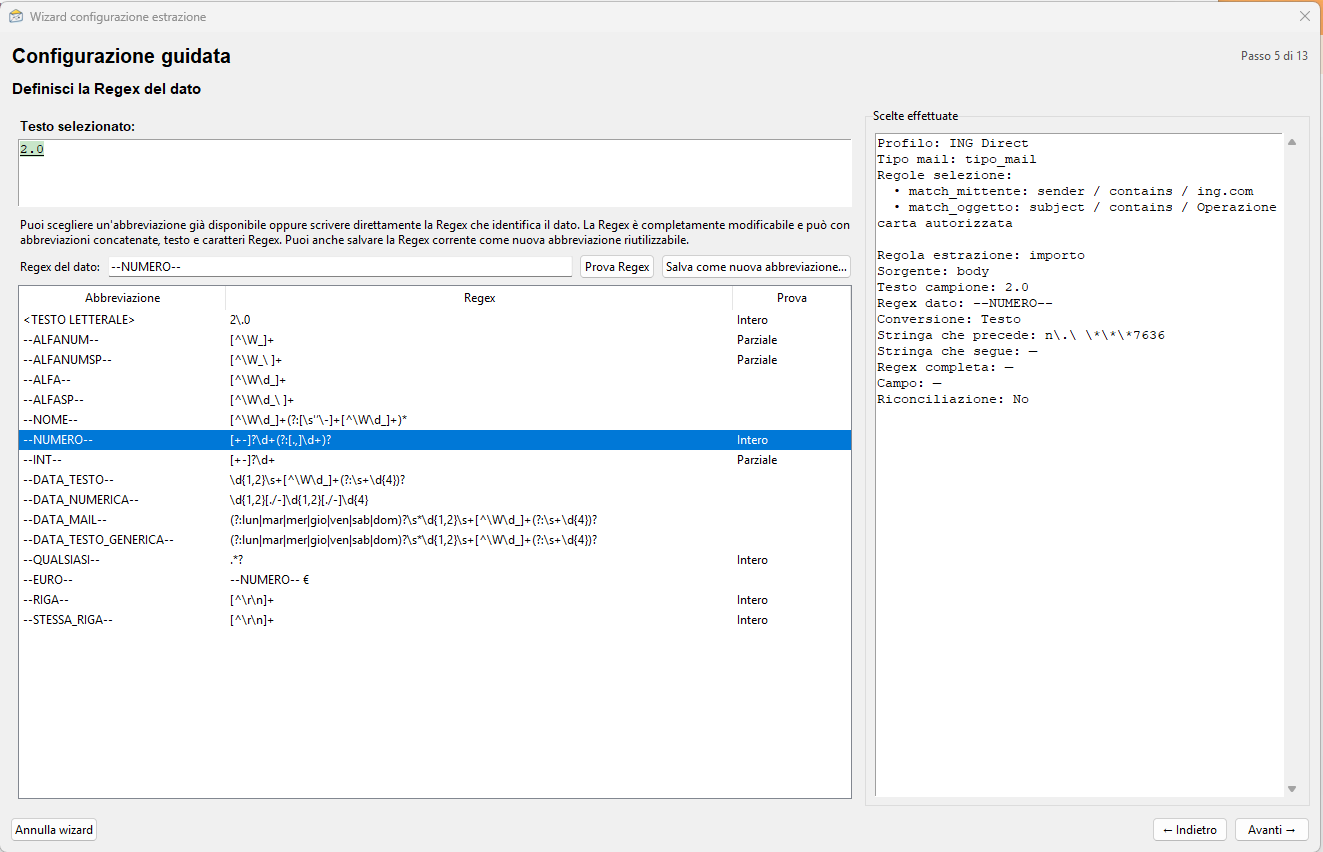
Step 6 — Describe the data with a regular expression or shorthand
The Wizard proposes a pattern for the selected value. Where appropriate, use EgoMailExtractor shorthand patterns such as --ALFANUM--, --NUMERO--, --QUALSIASI--, --EURO--, --DATA_TESTO-- or --DATA_NUMERICA--. These tokens retain their original spelling. The generated regular expression remains visible and editable.
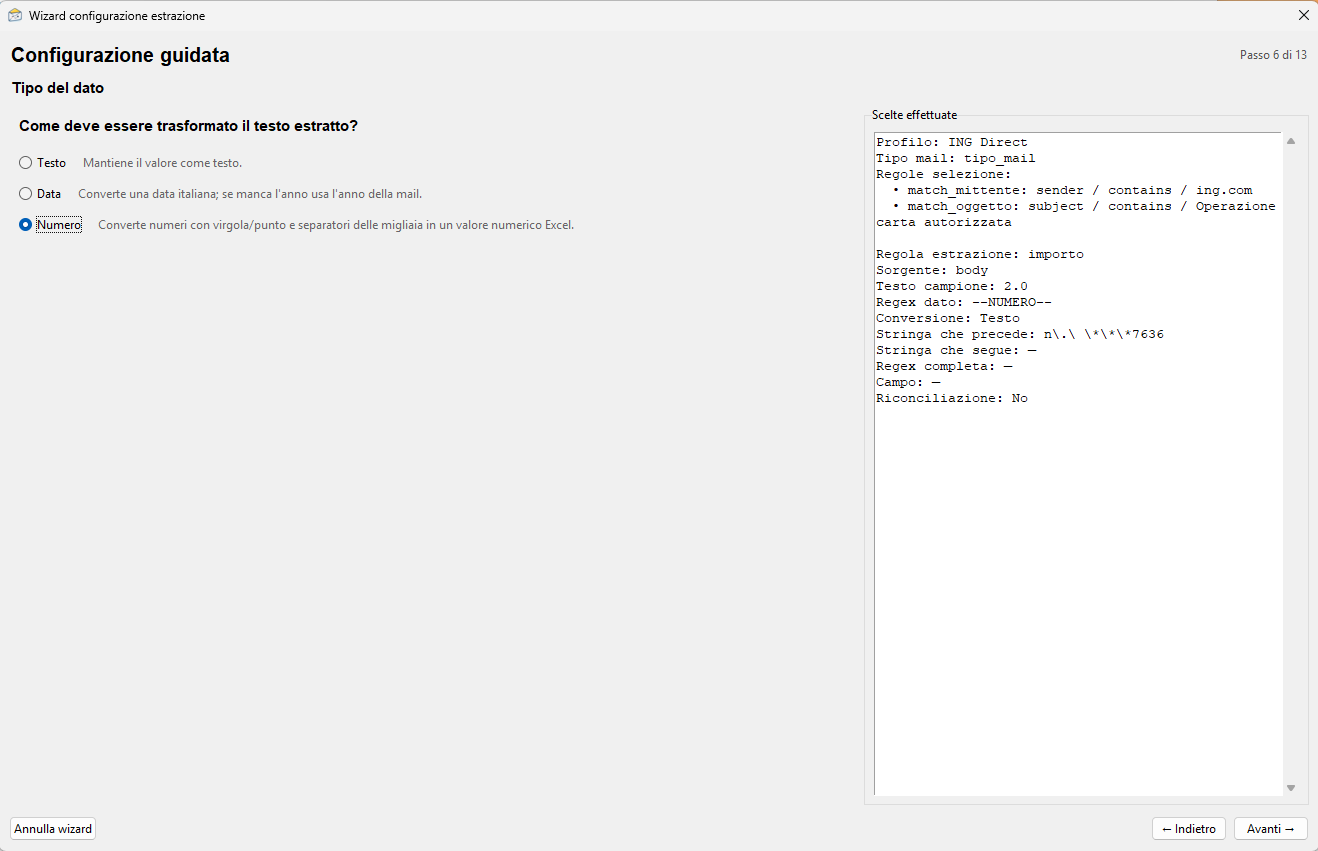
Step 7 — Choose the data type
Store the value as Text (Testo), Number (Numero) or Date (Data). This affects how Excel handles sums, sorting and formulas.
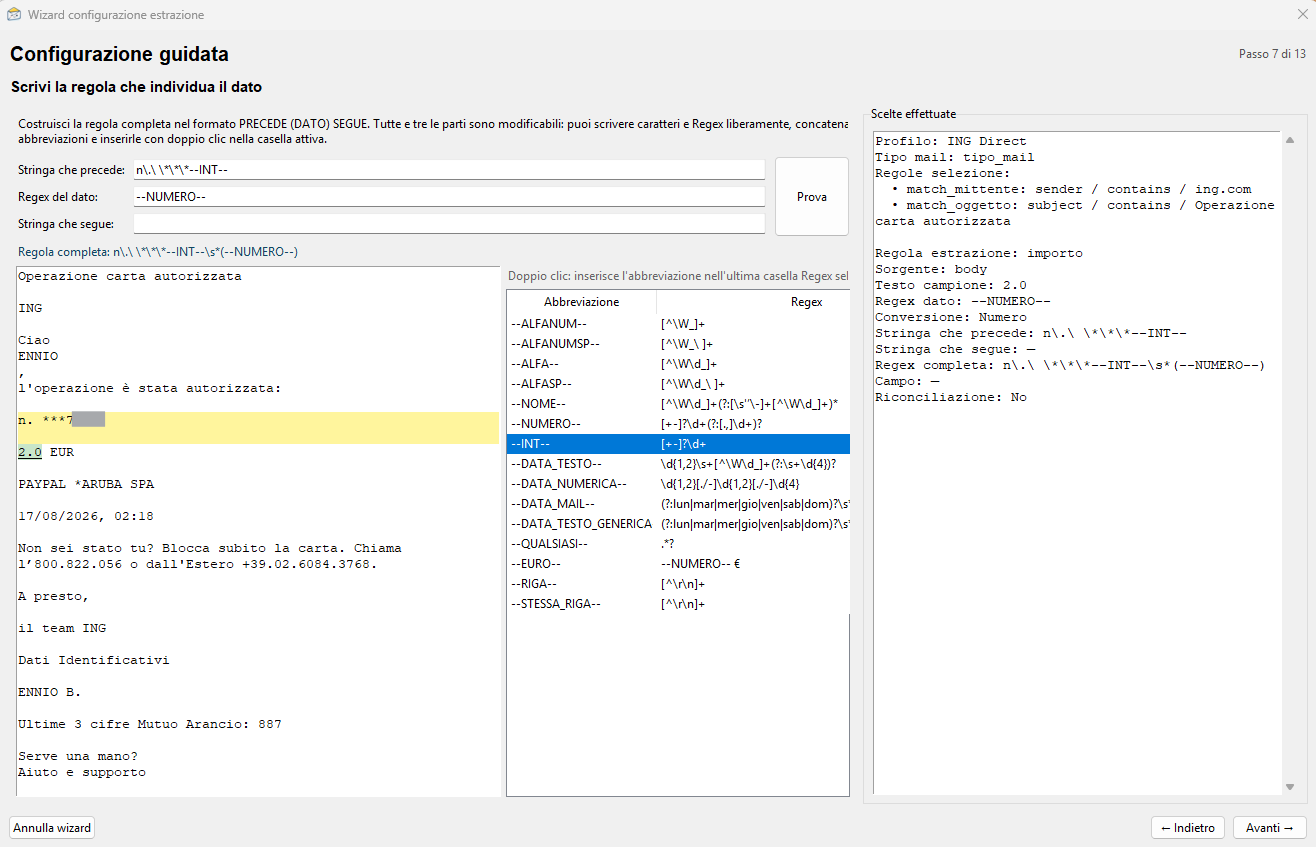
Step 8 — Define the preceding text: PRECEDE
PRECEDE tells the program how to reach the correct value. It often contains a stable word, label or structure immediately before the data. Variable sections can be represented by a regular expression or shorthand pattern.
Step 9 — Verify the rule against the example
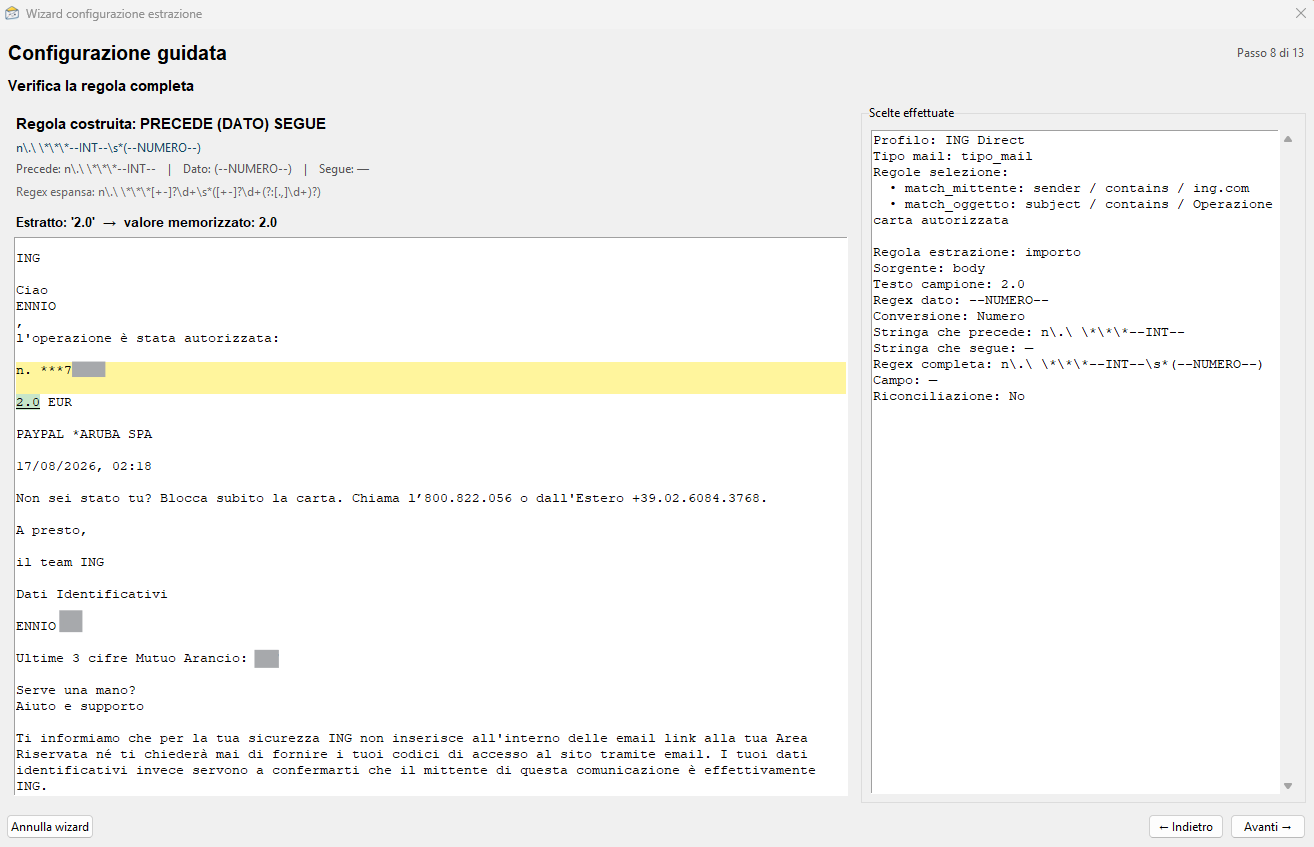
Check that PRECEDE – DATO – SEGUE extracts the correct value. The Wizard shows the result on the sample email. If it is incorrect, go back and adjust the rule.
Step 10 — Choose the destination field
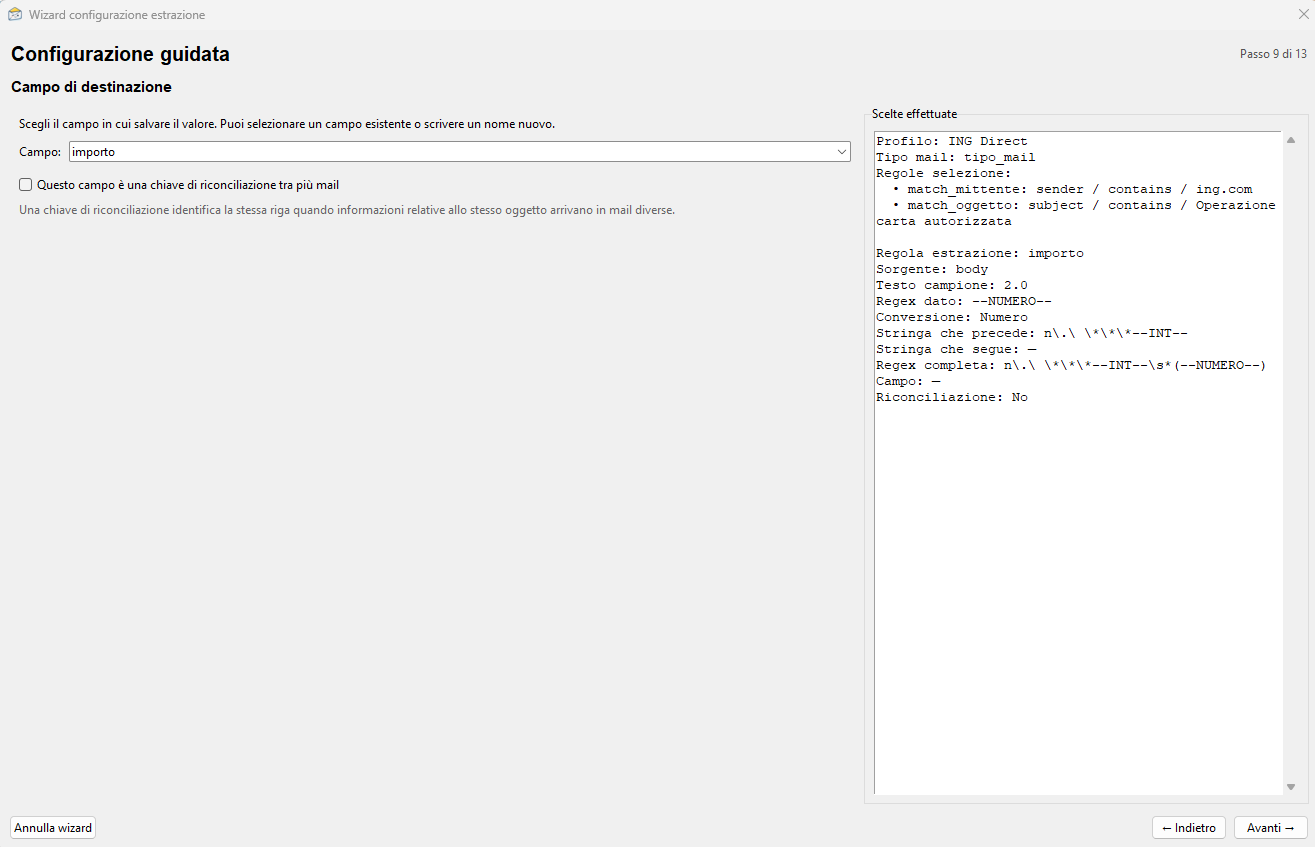
Associate the extracted value with an existing profile field or create a new field. Its name becomes a column in the consolidated Excel workbook and can be reused in formulas and summaries.
Step 11 — Assign an icon to the profile
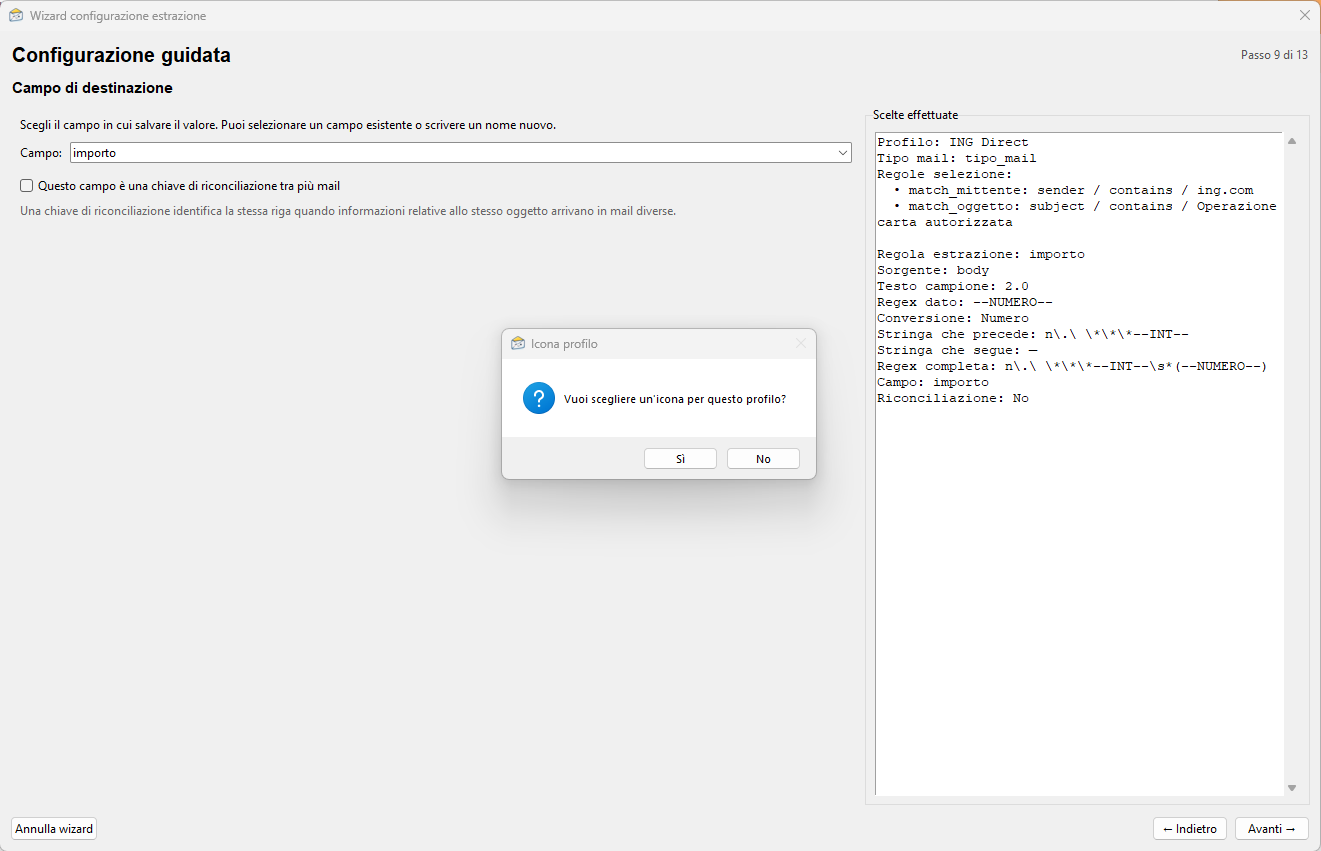
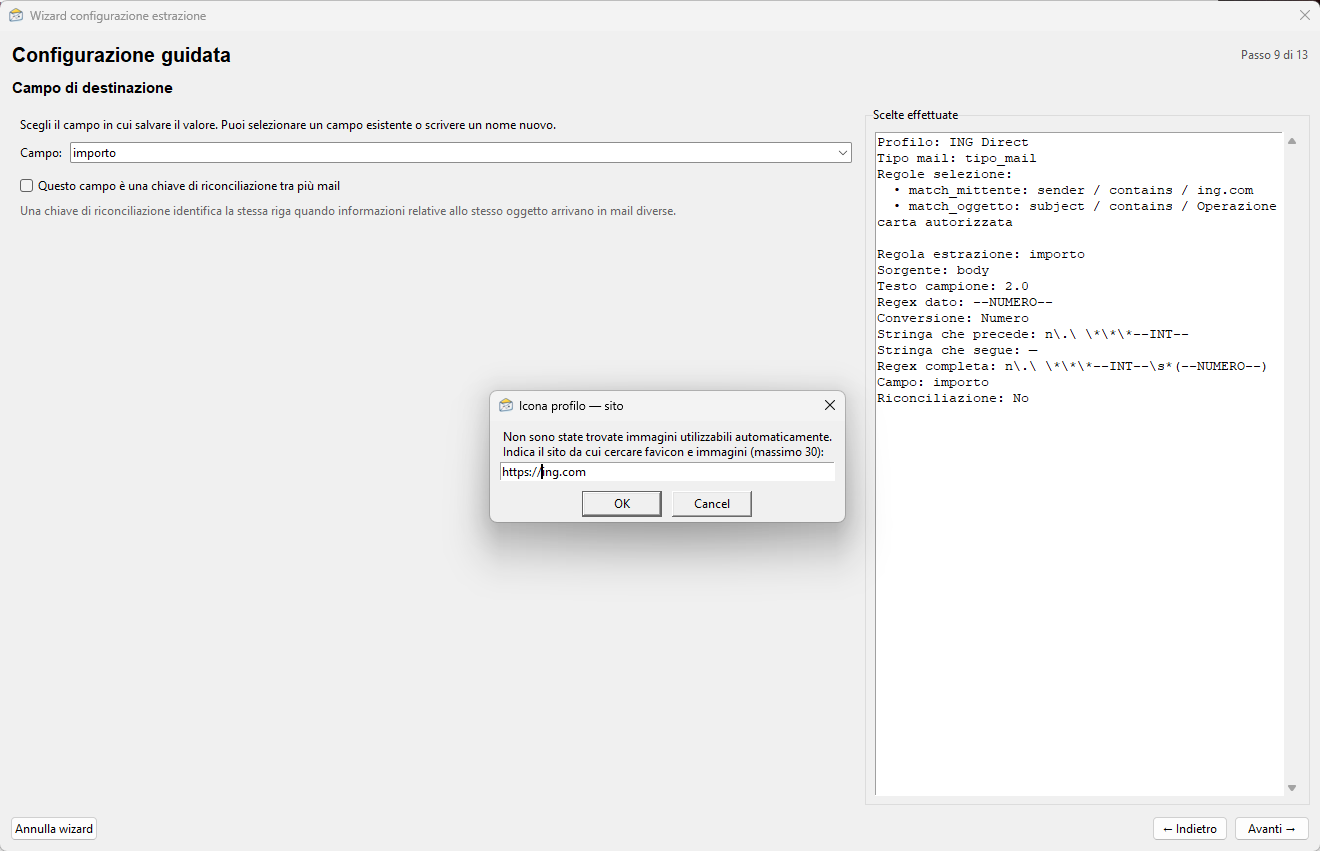
An icon helps identify the profile on the main screen. Use a local image or search for an image from the service website.
Step 12 — Find an icon on the website
When website search is used, EgoMailExtractor tries to retrieve suitable images. Choose an appropriate one or provide an alternative.
Step 13 — Run an extraction test
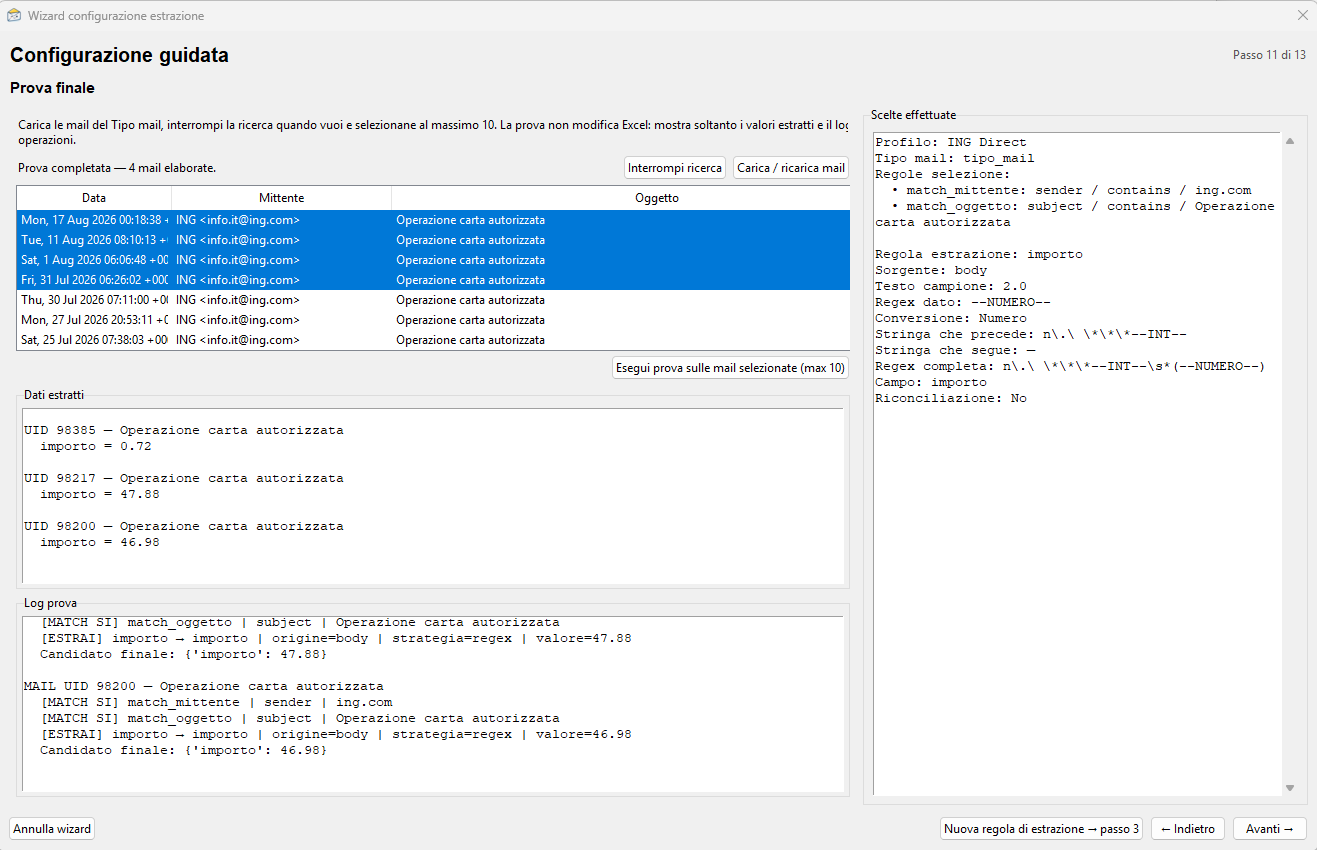
Test the profile on several messages before using it routinely. Verify that the filters select the right emails and the rules extract consistent values beyond the original sample.
Step 14 — Create a summary field
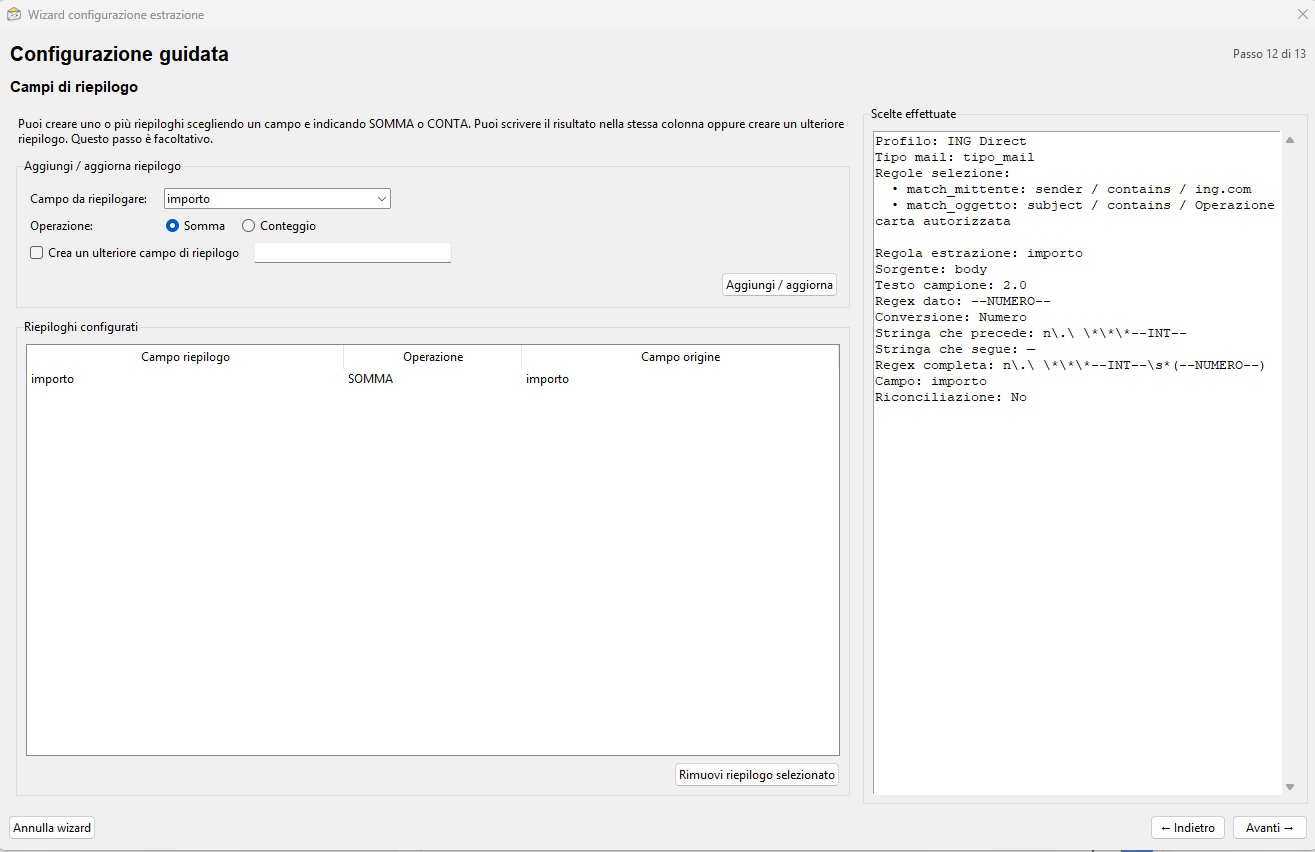
Summary fields calculate indicators such as a sum or count from extracted data. They can appear on the main screen and be reused in formulas.
Step 15 — Create composite formulas
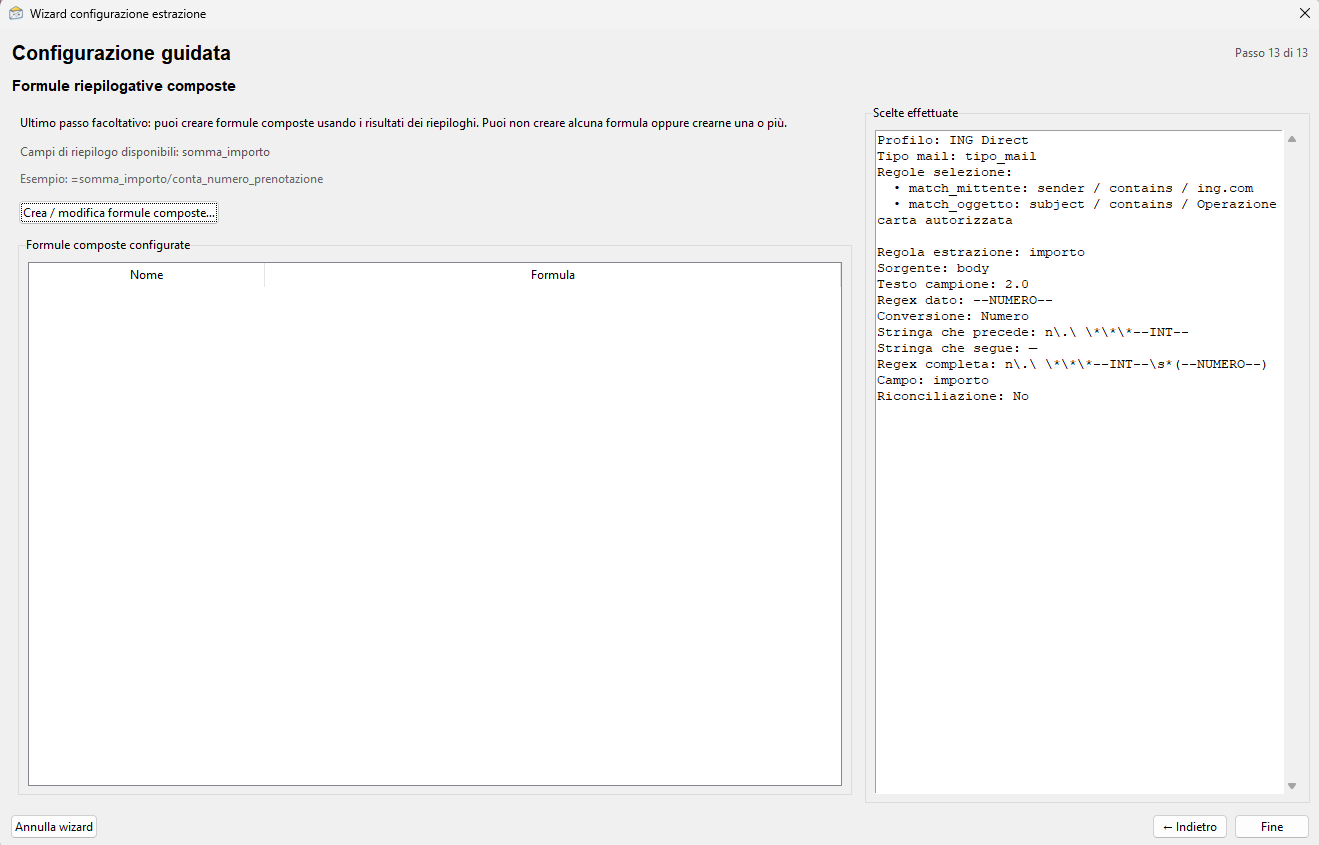
Combine fields and summaries to calculate derived values, such as averages, differences or other indicators for reviewing transactions.
Step 16 — Activate the profile
Save the completed configuration and activate the profile. The main screen will use its rules, fields and summary settings.
Step 17 — Use the completed ING profile
The profile is now available on the main screen. Start extraction, check the last run and review any configured summary values.
Reconcile information from different emails
When information about the same event arrives in different messages, define one or more fields as reconciliation keys. If the same identifier appears in several emails, EgoMailExtractor can combine their data into the same row.
Summaries, formulas and totals
In addition to individual records, the program can produce summaries, sums, counts, formulas and totals. Configurable totals and pivot tables are Pro features.
Community/Open Source edition
The Community/Open Source edition is publicly available on GitHub under the Apache License 2.0. It supports one mailbox profile and one extraction profile, with manual management of email types, fields and rules. The visual Wizard described here is a Pro feature.